Oreo Baileys Chocolate Mousse Cake with Pears

DSC05237b.jpg

Hello my dears!

Today, let me show you a recipe I am very proud of. This fantastic cake is sooooo good and so beautiful…I know I shouldn’t boast, but believe me, it’s one of the best I ever made.

dsc05260bDSC05073b.jpg

It was inspired by this cake from Caketime by Tamaris, however, I changed quite a lot of the recipe, for instance, I chose to use yoghurt instead of cream cheese, I added pears and sponges…you get the idea. I planned the cake for quite a few days and also tested parts of it. The key layer for me was the chocoalte mousse, which I perfected in a not too heavy version without eggs. Here you can see how I developped (and tasted!) my ideal chocolate mousse for the cake.

DSC05207b.jpg

When we cut into this cake on my birthday, I was delighted. The layers were distinct and the flavours in perfect harmony.

dsc05291b

As my guests ate almost the entire cake at a very quick rate (which I think is a good sign), I don’t have a very beautiful picture of the inside. Still, in these two you can more or less see what it looked like.

DSC05292b.jpg

DSC05294b.jpg

I am really in love with this cake – it is quite time-intensive, but it is worth every minute! Don’t forget to send me pictures, if you ever try it out!

DSC05236b.jpg

Have a lovely Sunday!

Best wishes from

Bettina, currently living in Winter Wonderland.

DSC05113b.jpgdsc05234bDSC05061b.jpg


_________________________________

Oreo Baileys Chocolate Mousse Cake with Pears

working time: about 2h 30 min
baking time: about 10 min
yield: a cake (with 20cm diameter)

Ingredients:

Bottom layer:

­       155g Oreos

­       55g butter

­       2 EL Baileys


Sponge:

­       4 eggs

­       120g sugar

­       1 pinch of salt

­       2 tbsp. warm water

­       zest of ½ a lemon

­       80g flour


­       2-3 tbsp. sugar for the kitchen towels

Filling:

­       2 pears

­       2-3 tbsp. sugar


­       540g Greek yoghurt

­       200g mascarpone

­       1 tsp. vanilla extract

­       8 tbsp. muscovado sugar

­       120g dark chocolate

­       3-6 EL Baileys

­       2.5 dl cream

­       6 gelatin sheets


Decoration:

­       at least 4 Oreos

­       100-125g dark chocolate couverture

­       1-1.5 dl cream

­       1-2 tbsp. Baileys

­       1-2 tbsp. powdered sugar

­       1 sachet Express Gelatine (or whipping cream stiffener)

Preparation:

  1. Preheat the oven (or, if you have the possibility, two ovens) to 220°C.
  2. For the bottom layer: Grind the Oreos and mix them with melted butter and Baileys. Press into a cake ring and put into the fridge for about half an hour.


  1. In the meantime, prepare the pears: Peel the pears and cut them into bite-sized pieces. Put them together with 2-3 tbsp. of sugar into a small pot and let them cook for about 15-20 min. If necessary, you can add a bit of water at the beginning.


  1. Prepare the sponge: Separate the egg whites from the egg yolks. Put the egg yolks into a large bowl and put the egg whites into a medium sized bowl.
  2. Add sugar, one pinch of salt and warm water to the egg yolks. Whisk until light and fluffy. Add zest of ½ lemon. Set aside.
  3. Add a pinch of salt to the egg whites and whisk with an electric whisk until stiff. Put the whipped egg whites on top of the egg yolk-mixture.
  4. Sift the flour and ground almonds on top. Gently fold in and combine, trying to keep the volume.
  5. Pour the mixture into two tins (covered with baking parchment) and level into two squares of about 25x25cm (about 1-1.5cm high), smoothing the top with a palette knife.
  6. Bake for 8-10 minutes in the middle rack of the oven until golden brown on top. Generously sprinkle two kitchen towels with the additional white sugar. Carefully turn the sponges out of its tin onto the towels. Immediately remove the baking parchment. Cover sponges with the baking tins and let them cool down. Take the cake ring off the Oreo layer, wash it and cut the sponge layers using the cake ring as size guidance.


  1. For the filling: Put each 270g yoghurt, 100g mascarpone, ½ tsp. vanilla extract and 4 tbsp. muscovado-sugar into two different bowls. Mix to combine.
  2. Melt chocolate over a bain-marie and soak the 3 gelatin sheets for the Baileys crème in a bowl of water.
  3. Whip the cream until stiff. Add 3-6 tablespoons of Baileys to the bowl in which you want to make the Baileys crème.
  4. Put the gelatin sheets into a small pot together with 3 tbsp. of water and warm slightly until the gelatin dissolves. Add 2-3 tbsp. of the Baileys cream and mix it with the gelatin. Then, add this liquid to the rest of the crème while whisking. Carefully add half (i.e. about 125 g) of the whipped cream.IMG_20170116_183423_762b.jpg
  5. Put the Oreo bottom layer onto a cake plate. Close the ring again around the Oreo layer. Pour 2/3 of the Baileys crème into the cake ring. Lay a sponge layer on top and spread the pear cubes onto this sponge.
  6. Prepare the gelatin sheets for the chocolate mousse and add it to the yoghurt mixture for the chocolate mousse as described above. Then whisk in the melted chocolate. Carefully add the rest of the cream.
  7. Put the chocolate mousse onto the pIMG_20170116_183443_910b.jpgears (you might not need all the chocolate mousse, which is not a problem). Put the second sponge onto the chocolate mousse and on to the rest of the Baileys crème. Make sure the top is as even as possible.
  8. Let the cake set in the fridge for at least 2-3 hours or overnight.
  1. For the chocolate net: Melt dark chocolate and pipe a pattern onto kitchen foil. It should be slightly higher than the cake. Wait until the chocolate is almost set, thenIMG_20170117_073127_946b.jpg

    press the kitchen foil around the cake and put it in the fridge for 10 minutes. If you miss this moment and chocolate is already too hard, use a blow-drier to warm the chocolate up gain. Let the cake rest in a cool place


  1. Whip the cream until stiff together with powdered sugar and Express Gelatine/shipping cream stiffener. Add Baileys. Put the mixture into a piping bad and decorate the cake as you wish. You might want to use some Oreos for this as well. Let the cake rest in a cool place for another 30 min. Serve and enjoy!

(cake inspired by a cake from Caketime by Tamaris)

_________________________________

To get a printed version:
Download the pdf. (Both English and German versions available!)

Oreo Baileys Chocolate Mousse Cake with Pears (English)

Oreo-Baileys-Schokoladenmousse-Torte mit Birnen (Deutsch)

dsc05257bdsc05239b

Chocolate Coffee Cupcakes with Baileys Frosting and Macadamia Nuts (Guest Post)

img_7868Hello my dears!

It’s already the third of December – time has really been flying lately! Only 22 days until Christmas, and this year I’m getting an early present: the recipe of these absolutely scrumptious looking beauties!img_7869

Sarah from the wonderful blog Hidden Sweet Treats has invented it just for me and chosen some of my favourite flavours to be the stars of her creation. When she showed me the first pictures, I felt that I could almost taste them from afar…and I cannot wait to try this recipe myself VERY soon! 🙂

But now – the stage is yours, Sarah – and thank you so very much for this fabulous recipe!

Best wishes,
Bettina.

~~~~~~~~

Hello everyone! I’m Sarah, the one behind the blog „Hidden Sweet Treats“ (www.hiddensweettreats.blogspot.ch). Being a guest on Bettina’s wonderful blog makes me really happy, because I love the baked goods she creates.

After we decided to bake something for each others blogs, I asked her if she had any wishes and she told me her favourite ingredients. The stars of my creation made part of them: chocolate, coffee, Baileys Irish Cream and macadamia nuts. As you can see, I baked some delicious cupcakes. They start with a moist and fluffy chocolate dough that I flavoured with some coffee, continue with a Baileys Irish Cream frosting made of creamcheese and whipped cream and end with some slightly salted and roasted macadamia nuts. The combination of these flavours is just amazing, the ingredients go together perfectly. And because of the coffee in the cakes and the fact that there isn’t that much sugar in the topping, they aren’t too sweet. Absolutely delicious.

Thank you Bettina for having me on your blog, it was a great pleasure!img_7872

_________________________________

Chocolate Coffee Cupcakes with Baileys Frosting and Macadamia Nuts

(for 10-12 cupcakes)

What you need:

  • for the cupcakes:
  • 100g dark chocolate
  • 125g butter
  • 120g sugar
  • 1dl espresso
  • 1dl milk
  • 1 vanilla bean
  • 1 egg
  • 135-140g flour
  • 1 tsp. baking powder
  • 20g cacao powder
  • 1 pinch of salt

for the frosting:

  • 30g butter
  • 200g cream cheese (e.g. Philadelphia)
  • ½-1dl Baileys
  • 2-3 tbsp. powdered sugar
  • 1 tsp. cacao powder
  • 1 tsp. gelatine express powder (e.g. Dr. Oetker)
  • 1dl cream
  • ½ sachet whipping cream stiffener (e.g. Dr. Oetker)

in addition:

  • 50g macadamia nuts
  • 1-2 pinches of salt

How to do it: 

  1. Prepare a muffin tin for 10 to 12 cupcakes. Preheat the oven to 180°C.
  2. Cut the butter into small cubes. Chop the chocolate and put it together with the butter over a bain-marie. Mix flour, baking powder, cacao, salt and vanilla in a bowl. Put the chocolate-butter mixture into another bowl and let it cool down. Add sugar, milk and espresso; whisk well. Add the egg and whisk again. Add the flour mixture and whisk until everything is well mixed.
  3. Pour the dough into the prepared muffin tin (each muffin liner should be about 2/3 full) and bake for 20-25 minutes. Check on the muffins after about 20 minutes, if necessary bake for a few more minutes. (Mine were perfect after 23 minutes.) Take them out of the oven and let them cool down completely.
  4. For the frosting: Whip the butter until creamy. Add cream cheese, Baileys, powdered sugar and cacao and continue to whisk while adding the gelatine express powder. Taste and add more powdered sugar or Baileys if you like. Whisk the cream in a separate bowl until stiff together with the whipping cream stiffener. Fold the cream carefully into the cream cheese mixture. Put the frosting into a piping bag with a round nozzle and put it into the fridge for 30 minutes.
  5. Chop the macadamia nuts and roast them in a pan (without fat). Put them into a bowl and season them with 1-2 pinches of salt.
  6. Distribute the frosting onto the cupcakes, put the macadamia nuts on to and enjoy.

Recipe by Sarah from Hidden Sweet Treats

_________________________________

To get a printed version: Download the pdf. (Both English and German versions available!)

chocolate-coffee-cupcakes-with-baileys-frosting-and-macadamia-nuts

schokoladen-kaffee-cupcakes-mit-baileys-frosting-und-macadamianussenimg_7870

Sweet Chestnut Chocolate Tarte with Spices (Recipe Testing)

dsc04123bHello everyone!

I’m back – and I’m bringing a wonderfully chocolately and perfectly delicious tarte along with me. And the best thing is: there are chestnuts in it!dsc04103bAutumn has definitely come (only look at this picture my Dad took out of our window yesterday!) and for me, an autumn without sweet chestnuts is unimaginable – I love both their wonderful flavour and texture. Luckily, Sarah from “Hidden Sweet Treats” managed to transfer both into her lovely little tartes.dsc04114bI love the combination of chocolate, spices (cinnamon, cardamom and vanilla) and chestnuts – they’re in perfect harmony. The tartes’ texture is soft, the sort of “melting-in-your-mouth” everyone must love. And sometimes, you find a small piece of crumbly chestnut in it – this is really as good as it can get.dsc04131bThe tartes are very rich and best enjoyed in small bits – for example alongside a hot Cappuccino with Baileys (as I love it).dsc04125b

Check out Sarah’s recipe and her absolutely gorgeous blog right here.

Have a wonderful rest of the weekend,

Bettina.dsc04121b


Chocolate-Caramel-Cupcakes with Dulce de Leche Frosting

DSC01910instaHello my dears!

Today I have some lovely and very chocolately cupcakes for you! I discovered their recipe on the wonderful blog Alinas Glücklichmacher. Her pictures looked soooo good – I simply had to give her recipe a try!DSC01877blog

I made the Dulce de Leche myself – it was super easy and the result absolutely delicious.

DSC01932instaYou can find my slightly adapted version of Alina’s recipe below, and here you can find her version.DSC01863blog

I really liked the combination of the crumbly muffin and the soft, creamy frosting. Also, the flavours, chocoalte and caramel, go simply fabulous together. DSC01837blogMy tip for the frosting: Let it stay in the fridge for no less than 1hour! At the beginning, my frosting was quite runny. After 40 minutes, it was already quite set – and after 1 hour, it was perfect. Below you can see the difference between 40 minutes (right) and 60 minutes (left) of waiting. Waiting was really worth it, in my opinion. 🙂DSC01862blog

Enjoy this long weekend!

Best wishes,

Bettina.DSC01891blog

_________________________________

Chocolate-Caramel Cucpakes with Dulce de Leche-Frosting

yield: 10 cupcakes
preparation time: 25 min
baking time: 25 min
if you prepare the Dulce de Leche yourself: 2h additional waiting time

Ingredients:

For the muffns:

  • ­       150g dark chocolate
  • ­       110g butter
  • ­       160g flour
  • ­       1 tsp. baking powder
  • ­       65g muscovado-sugar
  • ­       55g white sugar
  • ­       2 eggs
  • ­       60g coarsely chopped/broken caramel chocolate (or another chocolate of your choice)
For the frosting:

  • ­       250g mascarpone
  • ­       6 tbsp. dulce de leche
  • ­       1 sachet whipping cream stiffener
  • ­       1 tsp. muscovado sugar
  • ­       ½ tsp. vanilla-extract


To prepare the Dulce de Leche:

  • ­       1 tube of sweetened condensed milk

Preparation:

  1. For the preparation of the Dulce de Leche: Press the content of the tube of Dulce de Leche into a clean jam jar and close it firmly. Put the jar into a pot with boiling water for about 2 hours until the sweetened condensed milk has the colour of caramel. Let it cool down.
  2. Whisk mascarpone, Dulce de Leche, whipping cream stiffener, sugar and vanilla-extract together. Important: Let the mixture cool down for at least 1 hour in the fridge! Only thus, the frosting can reach the perfect consistence.
  3. In the meantime, prepare the muffins: Preheat the oven to 180°C.
  4. Melt chocolate and butter over a bain-marie, mix the two and let the mixture cool down a bit.
  5. Sieve flour and baking powder and combine it with the sugar and the eggs.
  6. Add the chocolate-mixture and whisk shortly.
  7. Cut or break the caramel chocolate into coarse pieces and add them to the dough.
  8. Distribute the dough into the muffin forms and bake for about 25 minutes.
  9. Let the muffins cool down completely, then pipe the frosting onto them.

(recipe adapted from a recipe by „Alinas Glücklichmacher“)

_________________________________

To get a printed version:
Download the pdf. (Both English and German versions available!)

Chocolate-Caramel Cucpakes with Dulce de Leche-Frosting – Kopie

Schokoladen-Caramel-Cupcakes mit Dulce de Leche FrostingDSC01869blog

Italian Biscotti with Hazel and Macadamia Nuts and Two Sorts of Chocolate

Biscotti are like a holiday in Italy on the beach: simple, straight forward and long-lasting! While you can keep the memories of the bella vita italiana in your mind, you can easily store the biscotti for quite some time in a cookie box. The reason for this is, that they’re “bis-cotti“: twice baked.

This is also why I often choose them, when I want to surprise someone with a parcel via post, which I did in just this case. In fact, I also made another sort of biscotti – I’m going to share that recipe with you sometime soon!

Much love,
Bettina.

P.S. By the way, I was really excited when I watched The Great British Bake Off this week and discovered that they had to make biscotti, too – it seems as if there were biscotti everywhere at the time and I love it!

_________________________________

Italian Biscotti with Hazel and Macadamia Nuts and Two Sorts of Chocolate

Preparation time: about 25 min
Baking time: 25 min + 14 min
Yield: about 25 biscotti

Ingredients:

  • 280g flour
  • 50g ground hazel nuts
  • ½ tsp. baking soda
  • ½ tsp. baking powder
  • ¼ tsp. salt
  • 1 vanilla bean (scraped out)
  • 100g white sugar
  • 75g muscovado sugar
  • 2 eggs
  • 45g butter, melted and cooled
  • 100g dark bittersweet chocolate
  • 75g white chocolate
  • 50g coarsely chopped hazel nuts, roasted without fat
  • 50g coarsely chopped macadamia nuts, roasted without fat

Preparation:

  1. Preheat the oven to 180°C. Line a baking tin with baking parchment.
  2. Sieve flour, baking soda and baking powder into a medium bowl. Add ground hazel nuts, salt, vanilla and sugar.
  3. Mix the eggs (at room temperature) with the melted and cooled butter. Stir into the dry mixture.
  4. Chop the chocolate into small dices and add together with the coarsely chopped and roasted nuts to the mixture.
  5. Halve the dough and form it into two „logs“ (about 22cm long and 6cm wide). Put them next to each other but with enough space in-between onto the baking tin.
  6. Bake in the middle of the oven for about 25 min. Let them cool down for about 20 min on the baking tin. This is important – otherwise the biscotti will fall apart when you attempt to cut them.
  7. Reduce the oven temperature to 170°C.
  8. Put the “logs” on a breadboard and cut with a serrated knife slightly diagonally into 1,5cm thick slices. Put the slices on the baking tin (cut side up/down).
  9. Bake at 170°C for 7 minutes. Then carefully flip the biscotti over and bake for another 6-8 minutes until golden brown. Let them cool down completely on a cooling rack. Store in a cookie box.

(recipe adapted from „Backen – I love baking“ by Cynthia Barcomi)


_________________________________

To get a printed version: Download the pdf. (Both English and German versions available!)

Italian Biscotti with Hazel and Macadamia Nuts and Two Sorts of Chocolate

Hasel-Macadamianuss Biscotti mit zweierlei Schokolade

Guest Post: Orange Profiteroles with Chocolate Ganache

Orangen Profiteroles_2
~~~ TODAY: A GUEST POST WRITTEN BY MY DEAR FRIEND KATHRIN! ~~~

When Kathrin sent me a picture of these absolutely gorgeous profiteroles, I knew at once that she absolutely HAD to write another guest post! So…I kept sending her (subtle) 😉 reminders to do so – as of course she’s very busy with University stuff, too. And then, today was the day… ❤ I can’t wait to try out this recipe myself..!

Bettina

_________________________________

A while back, I was watching one of my favourite TV shows: The Great British Bake Off. What the bakers had to do to impress the judges this time was to make some pretty profiteroles. As I had never worked with this particular kind of pastry, I thought why not give this French choux pastry ball a try. And let me tell you, they weren’t nearly as difficult as I expected. You can basically fill them with whatever you like. In my case, the combination of the chocolate icing and the orange filling was simply delicious – no wonder these round beauties were gone within only a day!

Ready, set, bake! Good luck 🙂

Kathrin (@bakingkate)

_________________________________

Profiteroles Filled with Orange Chantilly Cream

Inspired by Mary Berry’s profiteroles. Written by @bakingkate.

Yields: 25-30 profiteroles
Preparation time: 30 minutes to an hour
Baking time: 30 minutes

Ingredients:

For the choux pastry:

o   220ml water
o   2tsp caster sugar
o   85g butter
o   140g plain flour
o   3 eggs

For the filling:

o   250ml double cream o   1tsp orange zest
o   1tsp orange juice

For the chocolate icing:

o   100g chocolate
o   30g butter
o   4tbsp water
o   150g icing sugar, sifted

Method:

  1. Preheat the oven to 200 degrees Celsius and line two baking trays.
  2. Add the butter and sugar to the water and melt in a saucepan over low heat.
  3. Once the sugar and butter are melted, increase the heat and quickly ‘shoot’ the sieved flour into the saucepan.
  4. Remove the heat and stir with a cooking spoon until the pastry starts to come away from the side of the pan. Remove the pan from the stove and set aside to cool.
  5. Once the pastry mixture is a bit cooled, gradually add the whisked eggs while stirring vigorously. For a while, nothing will happen, but don’t give up yet! Keep stirring and like magic you suddenly start getting dough. Keep mixing until the dough is smooth and shiny.
  6. Spoon the mixture into a piping bag with a large round tube and make blobs of about 3cm in size. Bake for about 25 minutes.
  7. Once they’re turning golden brown, take them out and carefully pop a hole in their bottoms (this allows the steam to escape so the inside don’t get soggy). Put them back in the oven for 5 more minutes.
  8. While the profiteroles are cooling, whip the double cream and orange zest until soft peaks form. Carefully mix in the orange juice.
  9. To make the chocolate icing, melt the chocolate over a bain marie. Add the butter and 4 tablespoons of water. When the chocolate is melted, remove the bowl from the heat and stir in the icing sugar until you get a smooth texture.
  10. Once the profiteroles are cold, pipe the orange Chantilly cream into them through the hole we made earlier. Dip each one into the chocolate icing to coat the top part. Leave to set, then serve.Orangen Profiteroles_1

_________________________________

To get a printed version: Download the pdf. (Both English and German versions available!)

Orange Profiteroles with Chocolate Ganache

Profiteroles mit Orangensahnefüllung und Schokoladenganache

“Hearts on Fire”-Rabbits

SONY DSCDid I say that we need more rabbits? I meant, of course, we need MANY MORE RABBITS!SONY DSCThese here are made of the cookie dough used in my Hearts on Fire-recipe. You can find it right here.SONY DSCJust pipe some little rabbits (or Easter eggs) as I did here and decorate with dark chocolate couverture. (I used a 1cm round nozzle to pipe and a little brush to apply the chocalate.) So easy and so cute! ❤

SONY DSCYou can make some of these even before Easter Sunday as you’ll probably have all the necessary ingredients at home anyway. Give it a shot!SONY DSC

Cake Pops from Outer Space

SONY DSCBaking with kids is fun – and exhausting, but mostly fun! And making these little cute aliens/planets with the children of one of the local kindergardens was indeed great fun. The children (aged 4-6) loved to see how the cake pops are formed in the cake pop machine and “oohh”-ed when I opened the lid for the first time. To them, this was almost like magic.SONY DSCSONY DSCThe decorating, too, was a highly enjoyable affair. Each child could choose whether to create an alien (or as we called it a “Wuppi-friend”) or a planet.

SONY DSCSONY DSC SONY DSCI have never made cake pops without the cake pop machine, so I can’t really talk about the pro and cons of the two ways of making cake pops, only about what these here were like. Their texture was soft and fluffy and not too sweet which was good because the icing added the extra sweetness afterwards. Also, when decorated, these cake pops could be stored for quite a few days without getting dry.

SONY DSCI can really recommed baking these cake pops – with/for kids or adults alike, of course!SONY DSC_________________________________

Cake Pops from Outer Space

Preparation time: 15 min

Baking time: 4-6 min (per 12 cake pops)

Decorating time: 40 min

Yield: about 36 cake pops

Ingredients (for the cake pops):­       ⅓ cup of unsweeted cocoa powder

­       ⅓ cup of hot coffee

­       1 cup flour

­       ½ tsp. baking soda

­       ½ tsp. baking powder

­       1 pinch of salt

­       75g butter (at room temperature)

­       ¾ cup granulated sugar

­       1 egg (at room temperature)

­       1 egg yolk (at room temperature)

­       1 tsp. vanilla extract

­       ⅓ cup of milk

­       1 tsp. lemon juice

Furthermore you need: ­       about 200g green Candy Melts

­       dark chocolate couverture

­       sugar decoration (stars, hearts, pearls, …)

­       colourful fondant

­       about 36 small wooden sticks

Preparation:

  1. Whisk together the cocoa powder and the hot coffee in a small bowl. Set aside.
  2. Add 1 tsp. of lemon juice to the milk and let it rest for about 5 minutes (it will thicken a bit).
  3. Mix flour, baking soda, baking powder and salt in a small bowl.
  4. In a medium bowl whisk the butter until creamy. Add sugar, whisk again, then, add the egg and egg yolk. Whisk some more.
  5. Add vanilla extract and milk mixture to the cocoa mixture and whisk well.
  6. Add flour mixture and cocoa mixture alternately to the butter mixture (in about three steps).
  7. Grease and heat cake pop maker. Put about 1 tablespoon of batter into each hole and bake for 4-6 minutes.SONY DSC
  8. Let the cake pops cool down. Then melt the green Candy Melts (for the aliens) and/or the dark chocolate couverture. Dip the cake pops into the candy melts/dark chocolate couverture and decorate with fondant and sugar decoration.SONY DSC

(recipe after “175 Best Babycakes Cake Pop Maker Recipes” by Kathy Moore)

SONY DSC_________________________________

To get a printed version: Download the pdf.
(Both English and German versions available!)

Cake Pops from Outer Space

Cake Pops aus dem Weltall

Birthday Cake No. 1

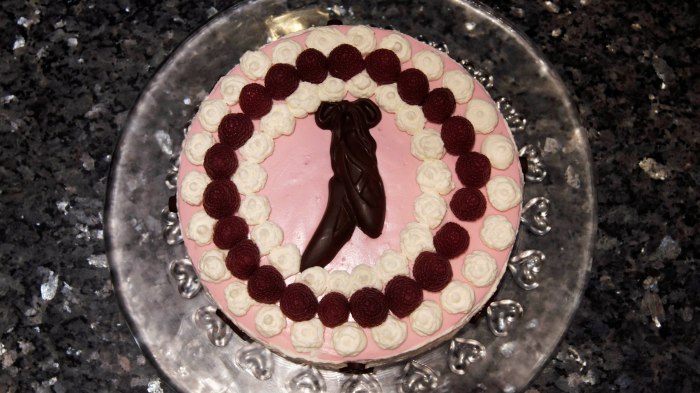
SONY DSCOooh, I’ve been baking for hours and hours this weekend! It was my birthday and I wanted to offer my guests a selection of sweet treats. SONY DSCI’ll show you the other recipes during the next couple of weeks – but I have to show you the pictures of my Himbeerquarktorte right away!SONY DSCIsn’t this cake beautiful? And absolutely D-E-L-I-C-I-O-U-S!! SONY DSCI decorated it inspired by two of my favourite hobbies – ballet and music. To create the lovely chocolate decoration I used chocolate moulds similar to those I used for Harry Potter’s Chocolate Frogs.SONY DSCSONY DSCYou can find the recipe of the Himbeerquarktorte here – go for it! SONY DSC

Hagrid’s Rock Cakes

Hagrid's Rock Cakes (classically with raisins on the left side and with chocolate on the right side)

Hagrid’s Rock Cakes (with raisins on the left side and with chocolate on the right side)

‘This is Ron,’ Harry told Hagrid, who was pouring boiling water into a large teapot and putting rock cakes onto a plate.

‘Another Weasley, eh?’ said Hagid, glancing at Ron’s freckles. ‘I spent half me life chasin’ yer twin brothers away from the Forest.’

The rock cakes almost broke their teeth, but Harry and Ron pretended to be enjoying them as they told Hagrid all about their first lessons. Fang rested his head on Harry’s knee and drooled all over his robes.

– Harry Potter and the Philosopher’s Stone, p.104

Hagrid’s kitchen mishaps are absolutely legendary! Typically, his Rock Cakes are a danger for any teeth and only consumable with a big mug of tea.

Today I experienced a minor kitchen mishap myself…it was a really stressful morning – I worked until 11 o’clock, then I walked home as fast as I could to cook for my parents who had to work until 12 o’clock. I decided to bake something small for dessert, too, and thought that it was time to bake some Rock Cakes.

Baking Rock Cakes is as easy as it can get – unless you’re in a terrible hurry, of course! I’m not bad at cooking and baking several different things at once, actually, and I didn’t notice that anything had gone wrong until my Dad asked me whether these Rock Cakes contained a lot of sugar. Then, the scales fell from my eyes and I realised that I’d forgotten to add any sugar! I had been thinking about what a pity it was that I couldn’t use my beloved muscovado sugar (as I had run out of it a couple of days ago) and thought I would use white sugar instead. But I didn’t.

SONY DSCThe surprising and good thing about my mishap is, however, that when I tasted the Rock Cakes, I didn’t feel like there was much sugar missing! Certainly not the 75g, the recipe had suggested. The ones with chocolate can go without any sugar, though I think I will add a little bit of sugar next time I bake them. The classical ones with raisins could do with a bit more sugar, but certainly not as much as 75g.

So, at least this unintentional experiment showed that I can gladly reduce the amount of sugar of my Rock Cakes recipe  and I have already done so in the recipe below (by the way, feel free to try out several different amounts of sugar yourself and tell me about it). Also, I feel it really fits that these Rock Cakes, after all, Hagrid’s Rock Cakes, are a bit imperfect. And they’re almost healthy, if you think about it. I think I’ll go and grab another one. =)

_________________________________

Hagrid’s Rock Cakes

Traditional Rock Cakes contain raisins. For all those who aren’t very fond of raisins their substitution by chocolate is a real alternative.

Preparation time: ca. 10 min

Baking time: 15-20 min

Yield: about 18 Rock Cakes

Ingredients:

    • 220 g flour
    • 2 tsp. baking powder
    • 1 pinch of salt
    • 40g sugar (or 20g, if you substitute raisins by chocolate)
    • 110g butter (cold, cut into cubes)
    • 1 egg
    • 2 tbsp. milk
    • 120 g raisins (or 120g dark chocolate, coarsely chopped)

Preparation:

  1. Preheat the oven to 180°C (350°F). Prepare a baking tin with a baking parchment.
  2. Sieve flour and baking powder into a medium bowl.
  3. Add salt and sugar.
  4. Add the cold butter (cut into cubes) and rub it with your fingertips into the dry ingredients until the mixture resembles grated parmesan. Be careful: You have to work quickly, otherwise the butter will melt.SONY DSC
  5. Make a well in the centre of the mixture and add an egg and 2 tablespoons of milk. Use a fork to whisk the egg and milk together and gradually mix into the dry ingredients. If the dough’s too dry add a bit more milk. Don’t overwhisk.SONY DSC
  6. Add raisins/chopped chocolate and form small heaps about the size of a teaspoon. Put them on the baking tin (with a space between them as they will spread).SONY DSC
  7. Bake in the middle of the oven for 15-20 minutes or until they get a golden colour.
  8. Let them cool down on a wire rack. They’re best when served with tea or coffee.

Tip: You can also bake both versions at once: Just add about 30g of sugar and divide the dough into two parts after you’ve added all the ingredients up to the milk. Then add 60g of raisins to one part and 60g of chopped chocolate to the other part.

(recipe after „Deliciously Vintage“ by Victoria Glass)

SONY DSC_________________________________

To get a printed version: Download the pdf.
(Both English and German versions available!)

Hagrid’s Rock Cakes_English

Hagrid’s Rock Cakes_Deutsch